

The following post is my account of the installation and configuration of Java 1.7 JDK, Android SDK 4.2, Ant and Phonegap 2.4.0 on Windows 7.
Most of the steps involved are covered by the Phonegap Getting Started Guide for Android guide, however I ran into a few issues requiring me to spend a while problem solving. I have elaborated on the parts the guide doesn’t mention, hopefully this post will save someone a few hours.
I used the the following versions:
- Phonegap 2.4.0
- Android eclipse-SDK-4.2.1-win32-x86_64
- Java JDK 1.7.0_15
- Ant 1.8.2 (WinAnt v7)
The following steps were performed on my 4-year-old Toshiba Satellite Laptop. It took some tweaking, but it finally works.
Step 1. – Install the Java JDK
I foolishly installed only the JRE. You will need to download and install JDK (x64). This will also install the JRE.
After you’ve installed Java, double check the installation directory. In my case this was C:\Program Files\Java\JDK1.7\bin
Adding Java to your Windows PATH
Hit Winkey+Pause
Select “Advanced system settings” from the sidebar
Hit the “Environment Variables” button.

Check the “System Variables” section
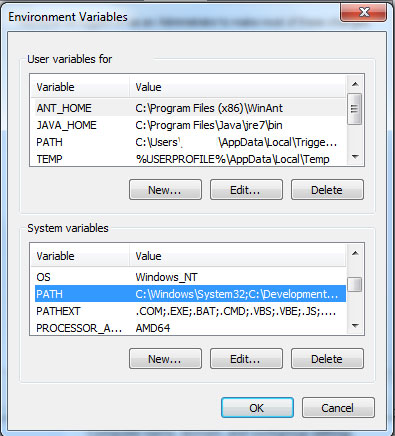
You should ensure you specify only the path to the java directory, not the javaw.exe executable itself. In my case I needed to specify the JAVA_HOME system variable. I then added this to my PATH variable, resulting in the following:
- JAVA_HOME –
C:\Program Files\Java\jdk1.7.0_15 - PATH –
%JAVA_HOME%\bin;
Step 2. – Install Android SDK and developer tools
Don’t follow the Phonegap guide.
The first step in the Phonegap guide instructs you to download the latest vanilla version of Eclipse, followed by the SDK
and platform tools. Don’t bother. Just download the Android SDK package, then extract everything into a suitable directory. In my case, I created a directory at C:\Development
That’s it, there’s no Windows installation process and no need for the ADT plugin. The SDK package comes with Eclipse and ADT pre-installed, and everything should run nicely.
Add the sdk tools to your Windows PATH
Follow the above steps for adding Java to your path, but append the following to the PATH variable:
C:\Development\sdk\tools;C:\Development\sdk\platform-tools;
Your directory paths may differ depending on where you have extracted the Android SDK.
Step 3. – Install Ant
The guide doesn’t specifically mention this, only that it needs to be added to your windows PATH. You’ll need to install it first. In my case, I just installed the latest WinAnt.
Add ANT to your PATH
Again using the above steps for adding Java, add the following:
- PATH –
%ANT_HOME%\bin; - ANT_HOME –
C:\Program Files (x86)\WinAnt
Again, your installation path may differ.
Step 4. – Install Phonegap
Download Phonegap and extract into your development directory. e.g. C:/Development/phonegap-2.4.0
Step 5. – Create a project directory
This the directory in which you can store your projects. e.g. C:/Development/projects
After completing the above steps, your Development directory should something like the following (minus the Facebook SDK!):

When you start Eclipse, it may prompt you to save your Workspace location. It’s important that this is outside of your project directory or stuff won’t work.
Step 6. – Create a new project
I just followed the Phonegap guide to create a new project using the Phonegap command line tools:
- In a terminal window, navigate to the
bindirectory within theandroidsubfolder of the Cordova distribution. - Type in
./create C:\Development\projects com.myname.testapp testappthen press “enter”
This will create new directory within the projects folder.
Next fire up Eclipse (the executable is in the eclipse directory). Once open, head to: File->New->Project...->Android->Android Project from Existing Code

Select the newly created folder in your projects directory. E.g. “testapp”. You should now see your new Phonegap project in the Package Explorer pane.
Step 7. – Configure the Android Emulator
NB: I have not installed the HAXM Emulator Accelerator as my machine does not support virtualisation. For now I will endure the slow performance.
I experienced problems building and running Phonegap using the emulator with Android 4.2. After installing Android 4.0, I managed to get it running fine. There are various solutions mentioned on sites such as Stack Overflow, but these are outside the scope of this post.
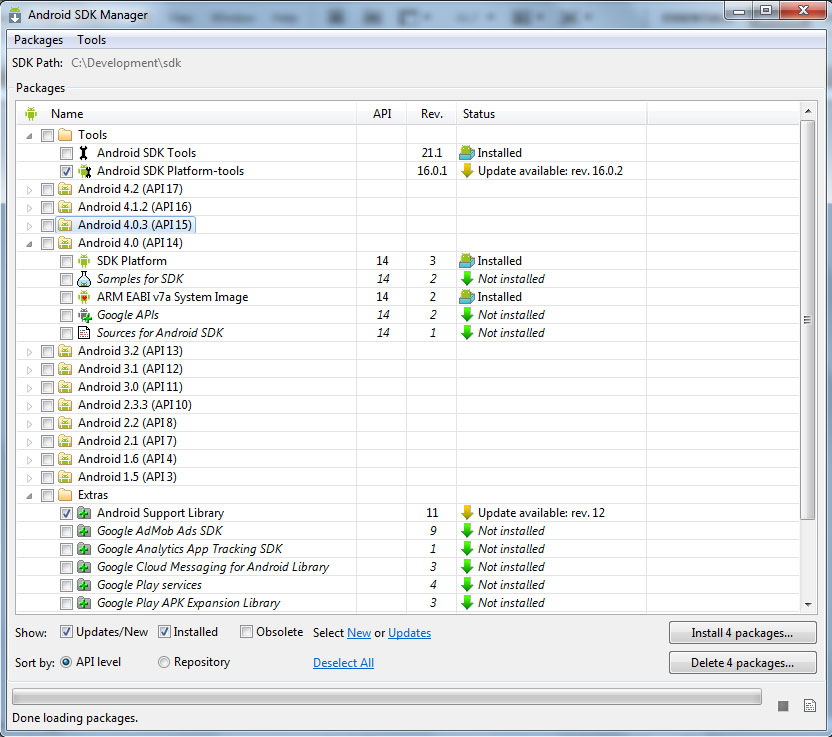
- In your C:\Development directory, run the Android SDK Manager.
- In the SDK Manager, install Android 4.0 SDK Platform.
Create an Android Virtual Device
In Eclipse head to, Window->Android Virtual Device Manager (VDM)

In the VDM, click “New…” to open the virtual device configuration dialogue. The image below shows a configuration which works well for me. Ensure the “Target” is set to Android 4.0.

Step 8. – Running your application
To run your application, right-click the project folder in the Package Explorer, select Run->As Android Application.
You should see the console log display “Android Launch!” and the Emulator should start.
After the emulator has launched, you might see something like this in the console:
“Waiting for HOME ('android.process.acore') to be launched...”
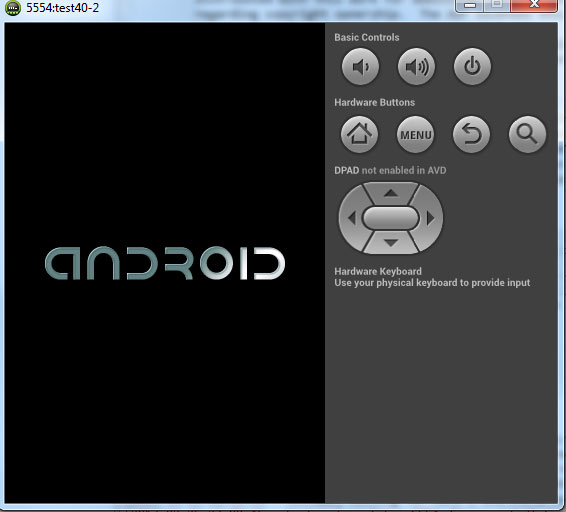
The emulator may then halt with a blank screen, or display a shiny Android logo.
If this is the case, with the emulator running, Right-click on your project folder and select Run as->Android Application. The console should then report Eclipse uploading your project’s .apk file to the emulator and installing the application. After a few moments, Android should launch with your app installed in the app menu.
Wait a few moments and finally…..

Unlock the emulator by clicking the padlock, hold, drag to the right, and release. You should see your app (or the default Phonegap/Cordova icon) on the apps screen.
Developing your application
You can continue to develop your app whilst the emulator is running. Just right-click and run project again. Eclipse will upload your new .apk version to the emulator. Simply relaunch your app in the emulator.
This is my first foray into Phonegap/Android development, so apologies for any errors or omissions. Hopefully this account has been useful, and will save someone some time.

Nice
In Step 6 you suddenly start talking about launching something under Cordova, which isn’t mentioned anywhere above.
I just followed the installation guide on the Phonegap site. Step 4 here: http://docs.phonegap.com/en/2.4.0/guide_getting-started_android_index.md.html#Getting%20Started%20with%20Android
I actually didnt figure it out and ill be obliged if you explained with a bit more detail 🙂 sorry im new to this!!
you write: “In a terminal window, navigate to the bin directory within the android subfolder of the Cordova distribution.”
Which terminal window is that? i tried in command line but i cant write commands starting with “.”
also you mention cordova distribution..what do u mean exactly??
Im sorry if my questions are a bit stupid, but i just started working with this
Hey no worries. As I stated, I just followed the Phonegap setup guide for this bit (bear in mind instructions for Phonegap 3.0 appear to be slightly different.). If you’re on Windows, use the command line. cd to the Cordova/android/bin folder of the Phonegap files that you downloaded. e.g.
cd C:\downloadedfiles\path\to\cordova\android\binThen just typecreate C:\Development\projects com.myname.testapp testapp(obviously change the name of the app and paths to meet your needs). See step 4 here: http://docs.phonegap.com/en/2.4.0/guide_getting-started_android_index.md.html#Getting%20Started%20with%20AndroidHaving just checked, the steps for Phonegap 3.0 are indeed different. I’ve since switched to Mac, but I will try to get round to updating the guide for 3.0. The first few steps are the same, but now the cordova command line tool automates much of the setup tasks: http://docs.phonegap.com/en/3.0.0/guide_platforms_android_index.md.html#Android%20Platform%20Guide
Oh, nevermind, I figured it out. Thanks!
Most excellent, Sir. I hit a few environment specific issues, but otherwise, went smoothly using this doc. Cheers!
Awesome guide man. Been trying for almost a day to get this working, this guide finally made it work for me, thanks a bunch!
Hi cookieflow.
This has been a great help for me!
Last time was such a bitch, this worked in 5 minutes!
Thanks again 🙂
No problem. I’m glad it’s saved you some time! 🙂
Thanks men!
PhoneGap(Cordova) + Android + Ant on Windows 8 | 현대컴퓨터
Thank you so much for providing useful information!(hug)
May I reference your post though my blog? Thanks in advance. 🙂